Sunday, June 16, 2013

Summer vacation

Why does summer seem to be so much busier than the rest of the year? I have not been to yoga class for five weeks but I made up for it this week doing construction work or rather demolition work.  The old 80's parquet tile in the kitchen and hall is gone. It took the better part of three days and some very sore muscles on my part but it is finally gone. Now I just have to level the floor and install my new laminate. That will be a snap right?.....we'll see.

Demolition doesn't leave much time for crafting. Fortunately for my creative needs I was lucky enough to be invited to a get together with my upline this weekend. That motivated me to design one card for a swap. The swap was to feature new products or colors and this is the result.


Primrose Petals and Midnight Muse
Stamp sets are
Featured new product is the Modern Mosaic embossing folder


Sunday, June 2, 2013

Wave the flag

Over the past week I spent so much time getting ready for a local con there was not much paper craft going on at my house. You can roll over to Fanboy Expo if you want to know what had me so distracted. You can also check out Geek Con Coverage on Facebook for event photos.  With that in mind I did manage to come up with one card design I felt was worth photographing. Ta-Da!
It has a vintage feel that reminds me of the Bicentennial celebration back in 1976. 

Supplies

To make this card emboss your bakes brown sugar card stock with the chevron pattern then drag the Raspberry ripple stampin' pad across the face of the embossed paper to create this great slightly uneven look. If you wanted a more uniform coverage using a brayer would be the way to go but I think the color variation adds to the vintage feel here. Next to create the stars fill a stampin' spritzer with 1/2 water and 1/2 bleach.( I used Clorox brand because that's what I use around the house.) spray onto the Midnight Muse card stock over a bleach safe surface. the more you spray the more stars you will have. I had to play around with that a bit as I over sprayed a few times and ended up with too much white.  
That is all there is to it. Now you just glue and mail it out to wish someone a happy Independence day. 


Monday, May 27, 2013

Spring Topiary

Last week working with vellum on one of my cards gave me an idea for a decor project. Here it is. A Rainbow colored butterfly topiary. Many times my brilliant ideas turn out to be lots of work and a great big mess all over the dining room table for a week that gets transferred directly to the trash. Once in a while they work. That is what keeps me crafting.
These are really easy and can be completed in just a couple of hours. First step is stamping the butterflies in black ink on vellum. give them couple of minutes to dry. Next color half  your stamped images using Stampin' Up! ink and blender pens in you choice of colors. Then cut out all your images and glue colored butterflies on top of the uncolored ones. Finally affix butterflies to a pre-made topiary, wreath or other decor item of your choice. I picked up the top ball and pot at a floral supply store and the stick came from my back yard.

supplies I used are:


Sunday, May 19, 2013

Swarm of Butterflies

I knew this was going to be a great stamp set. This week I went butterfly crazy again with the Best of  25 years butterfly set available here
When you stamp on vellum and color from the reverse side the result is a beautiful, life-like image. After creating this card I have a surprise up my sleeve for a home decor project using the same technique. Check back in a few weeks for that one.
Stamped on Vellum and colored using Stampin' Up! ink and Blender pens


Here is a simple yet sophisticated card suitable for sending to anyone but particularly a father or husband or son who doesn't like all the frills. A butterfly card for a man. Yep I just did that. If i were sending this to my sister I would just change up the colors for something more pastel and add a little bling to each of the butterflies.
Use Stamp-a-ma-jig to line up stamps perfectly

Next up is another masculine example with butterflies. This one is for a young man who is graduating  high school this weekend. It's such a great feeling to be able to give a card you made with care rather than just something you bought. Both the butterflies and the word "congrats" are stamped using ink that matches the card stock color. I love the tone on tone look. One of the best bargains for beginning stampers is to buy a set of card stock and stamp pads together. I recommend the In-Color collection as a good place to start. The colors in these collections are changed every two years so you know they won't look outdated.
2012-2014 In-color collection
Two colors from the collection are featured below, Midnight Muse and Summer Starfruit.
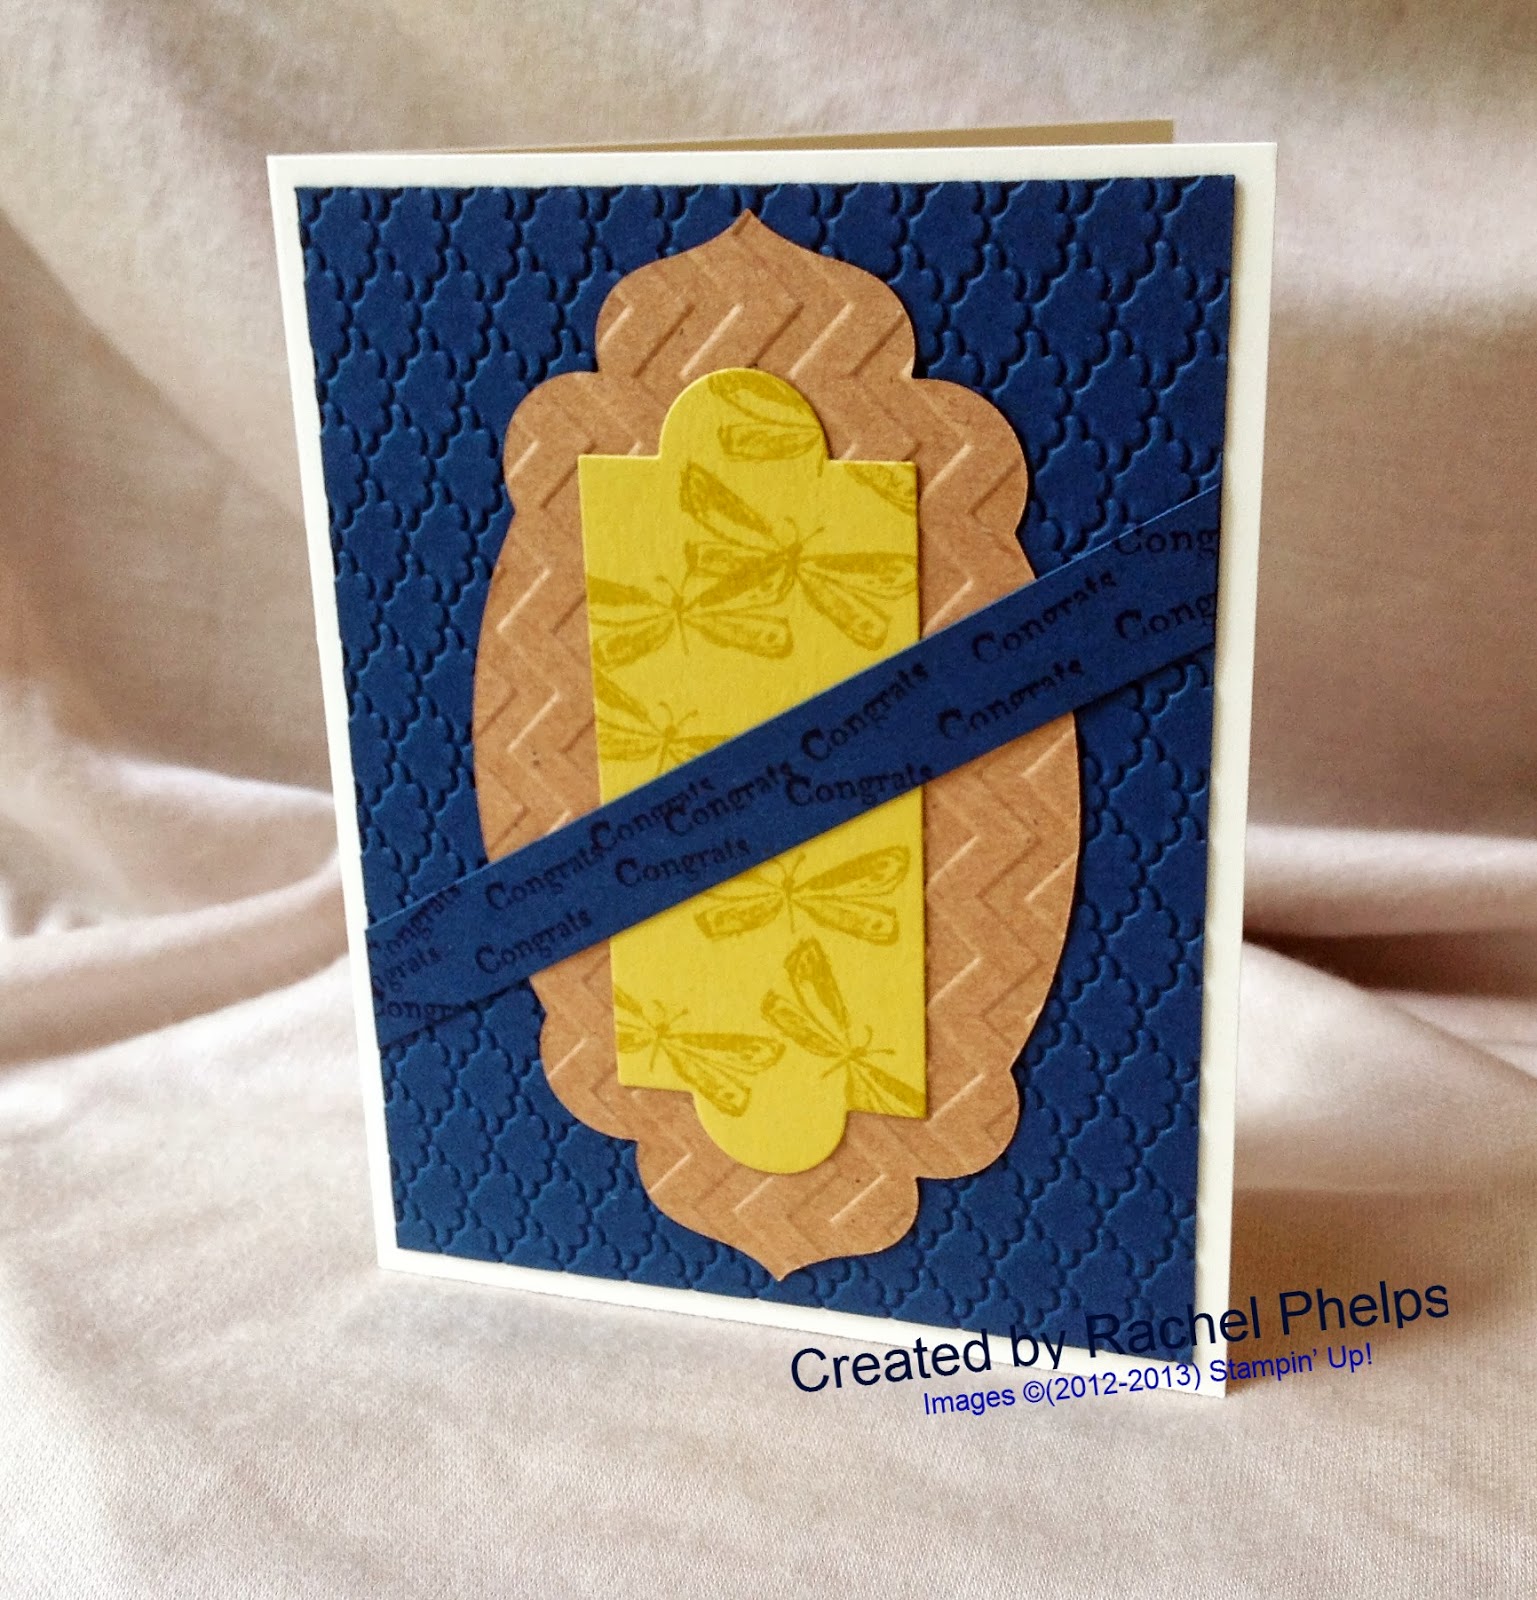
Multiple embossed elements add depth to the image
Finally this is the most simple but perhaps the most elegant card of the week.  Done completely in Whisper white and Basic black card stock with Basic black ink for the stamps; this card is also for a specific event. My brother is getting married and nothing says wedding like black and white. 


Friday, May 17, 2013

Kitchen Craft

This week I took a very short break from stamping to refurbish an old iron skillet. Baking is my greatest kitchen love and I understand from my mother there is no greater pineapple upsidedown cake than one made with an iron skillet.  My father gave me this old one some time back and it sat in the trunk of my car for a couple of months along with several other "some day" projects I have there. As you can see it needed quite a lot of work.


After a web search, the best instructions I found for the project were here ( I Believe I Can Fry) and involved using oven cleaner. After three days I was impatient and just scrubbed off the remaining residue with steel wool. It turned out fine and is now ready for baking cornbread.


Sunday, May 12, 2013

Best of Butterflies

I am seriously loving working with this set of butterfly stamps. Rather than stick to just cards this week, I branched out and decorated a few candles. These are amazingly easy and make great teacher gifts. you can use any smooth pillar candles. scented, unscented wax or soy. you simply stamp on tissue paper then transfer the image using a wax paper overlay and your Stampin' Up! heat tool. (available here) As you can see on the top candle using more than one color is no problem and fine details show up very well.  If you are in the Knoxville, Tennessee area and want to learn this technique for free, Just call or email to schedule a date for your own workshop.

Sunday, May 5, 2013

Best of 25 years

 Last week's blog post featured stamps from the sets Best of Love and Best of Flowers. I put up links to the sets but didn't really talk about the promotion so here you go. To celebrate their 25th Anniversary, Stampin' Up! is making some favorite retired stamps available for a limited time. This Is my Favorite promotion because it allows you to get some great stamps as a really great price. All sets are priced at $14.95. And when you buy six sets you earn a Free set of your choice from the collection. A new set is introduced every month and they will only be available until March of 2014.
This week I receive my Best of Butterflies set. I'm really looking forward to working with that one so check back to see how that turns out.
Best Of Birthdays Clear-Mount Stamp Set
January Best of Birthdays
Best Of Butterflies Clear-mount Stamp Set
April Best of Butterflies